Hi! I’m Walter, a 3D artist based in Tokyo, Japan. I specialize in character and environment design for games and cinematic projects. I’ve always been a huge Star Wars fan, and one character that really stuck with me, both visually and emotionally, was Kylo Ren, especially in The Force Awakens. Here is the breakdown of my 3D Portrait of Kylo Ren.
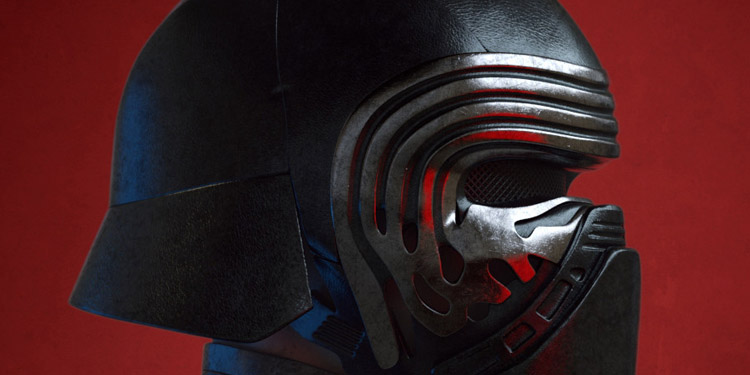
In my personal work, I enjoy creating 3D portraits of real people and fictional characters. So I challenged myself to create a realistic 3D portrait of Kylo Ren, focusing on capturing his unique features, helmet details, and the subtle mood that defines his character.
In this breakdown, I’ll walk you through my entire process, from sculpting and texturing to lighting and rendering. Whether you’re a fellow 3D artist or just a fan of character design, I hope this gives you a clear look into how this portrait came to life.
Gathering References
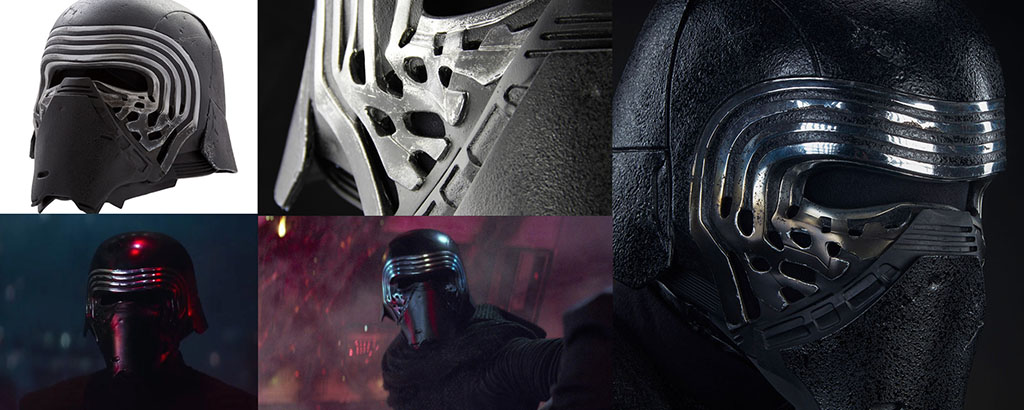
The first step in any project is gathering references, and Kylo Ren’s mask was no exception.
Since many of the scenes in the movies are dimly lit, I relied heavily on high-resolution photos of Kylo Ren action figures and official replicas available online.
These images provided a clearer view of the intricate details and shapes of the mask.
Modeling in Maya
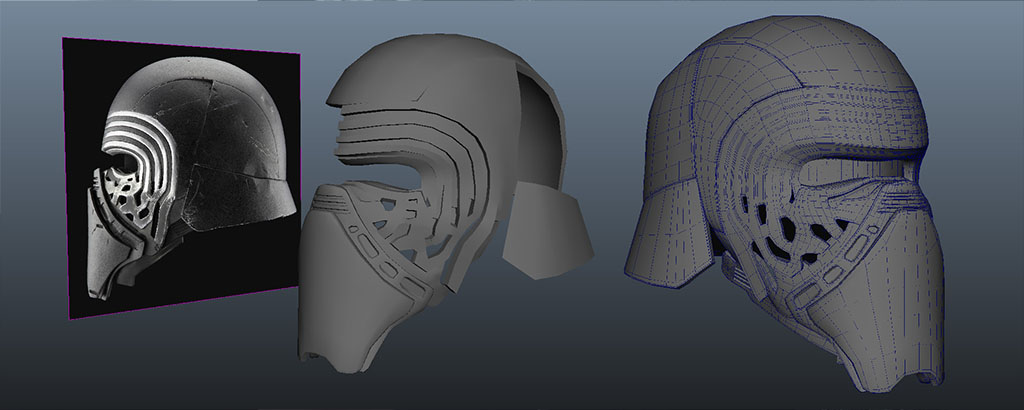
With a solid understanding of the mask’s structure, I began blocking out the primary shapes in Maya. I used a “box modeling” approach, which was refreshing after a long time away from this technique.
Importing image planes into the Maya viewport allowed me to model with precision, focusing on the chrome details and overall shape of the helmet.
Once the main forms were complete, I moved on to UV unwrapping.
UV Unwrapping
For this project, I used Maya’s updated UV editor (from Maya 2018), which significantly sped up the process. I applied planar projections to most pieces, unfolded them, and optimized the UV shells.
Finally, I scaled the UV shells uniformly to match their real-world proportions before exporting the mesh to ZBrush.
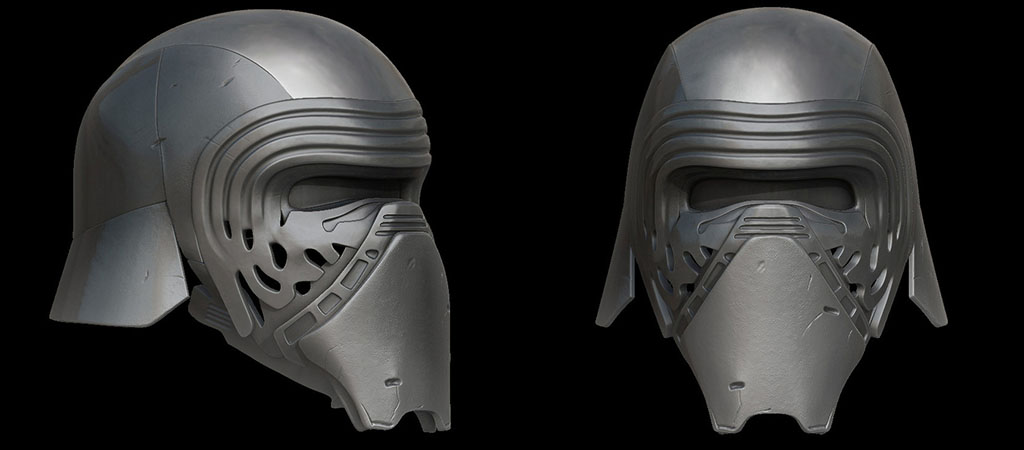
Sculpting in ZBrush
I used ZBrush to refine the model and add fine details, such as scratches, dents, and wear on the mask. A plugin called Styx made it easy to move between Maya and ZBrush without losing object names or assigned materials.
By the way, you can use one of Vertex Mode’s base meshes to get started on this step.
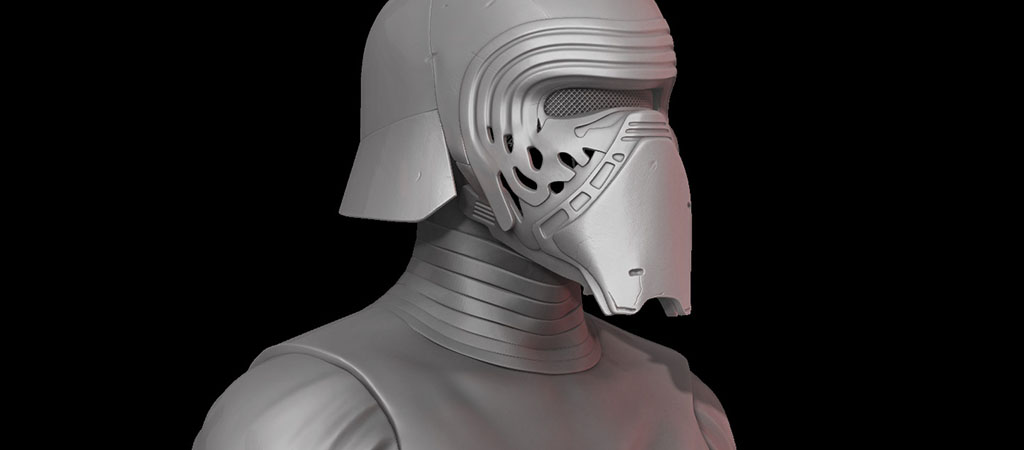
For the cloth sections, I used a specialized brush pack to sculpt realistic wrinkles and folds. Since this project was for a still render, I kept the high-resolution geometry rather than optimizing it for animation.
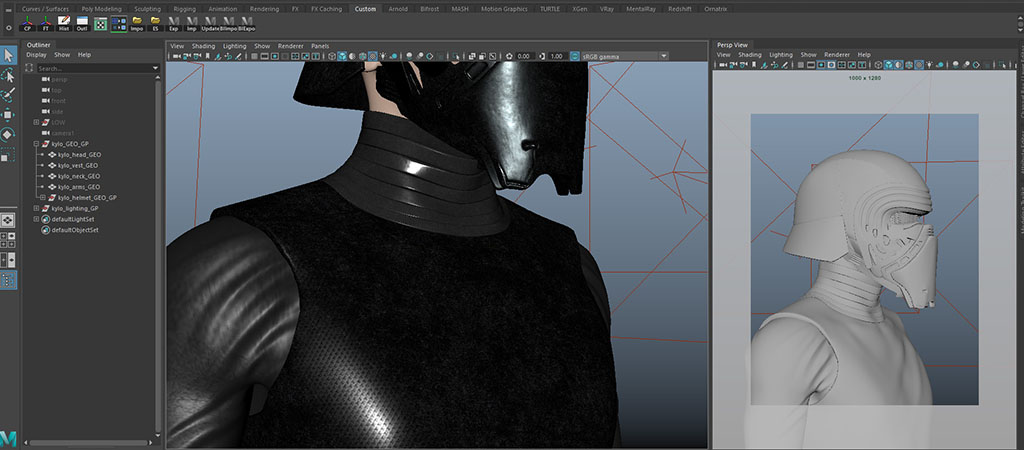
Look Development
With the sculpting complete, I moved on to look development. The model’s fine details were added as geometry, so I didn’t need displacement maps.
For the materials, I used a combination of generic and tileable textures for elements like leather and fabric. My workflow included creating diffuse, specular, roughness, and normal maps—a standard setup for VRay projects.
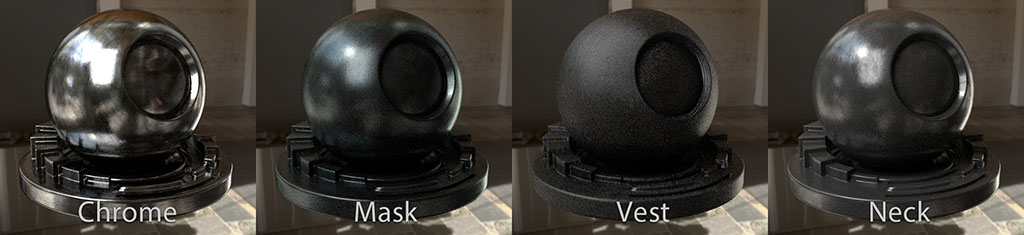
Kylo Ren’s costume appears entirely black at first glance, but on closer inspection, it features subtle variations in material and color. I created individual materials for different sections, such as the mask and clothing, to achieve a realistic look. Hypershade’s shader ball previews were invaluable for testing materials early on.
Lighting Setup
The lighting was crucial to capturing Kylo Ren’s menacing presence. Using VRay for Maya, I started with a dome light and an HDR texture to create reflections and general illumination.
I then added VRay Rect Lights to form a standard 3-point lighting setup, enhancing the chrome highlights on the mask.
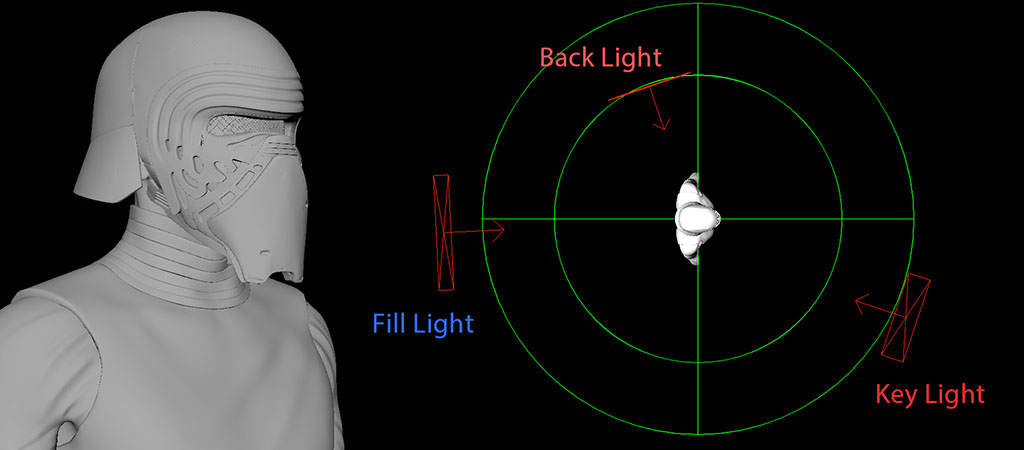
To evoke the atmosphere of a lightsaber duel, I incorporated subtle red and blue hues into the lighting, hinting at the clash between Kylo Ren and his opponents.
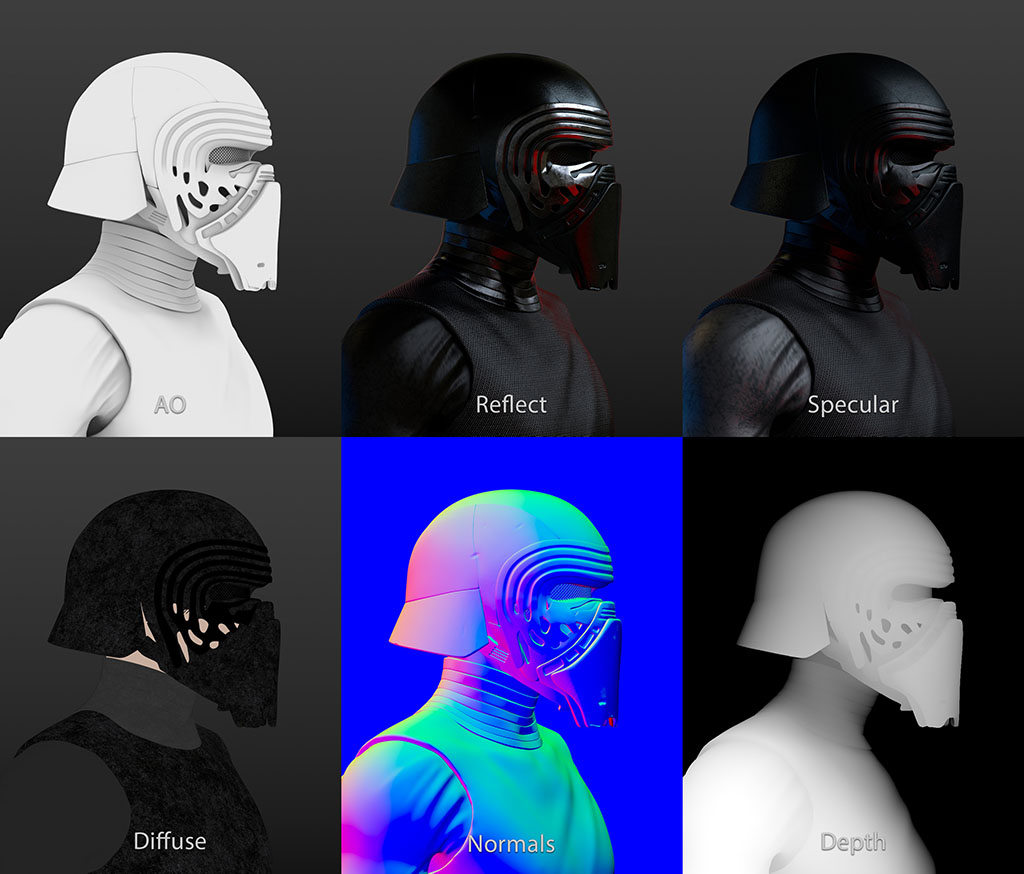
Render Elements
For flexibility in post-production, I rendered multiple passes using VRay’s Render Elements. These included:
- Diffuse
- Specular
- Reflection
- Normals
- Depth
- Ambient Occlusion
To create the depth pass, I measured the distance from the camera to the character using Maya’s distance tool. This allowed me to accurately set the black-and-white levels for the depth map.
I exported everything as a 32-bit multichannel EXR file, combining all the passes into a single, high-quality file for compositing.
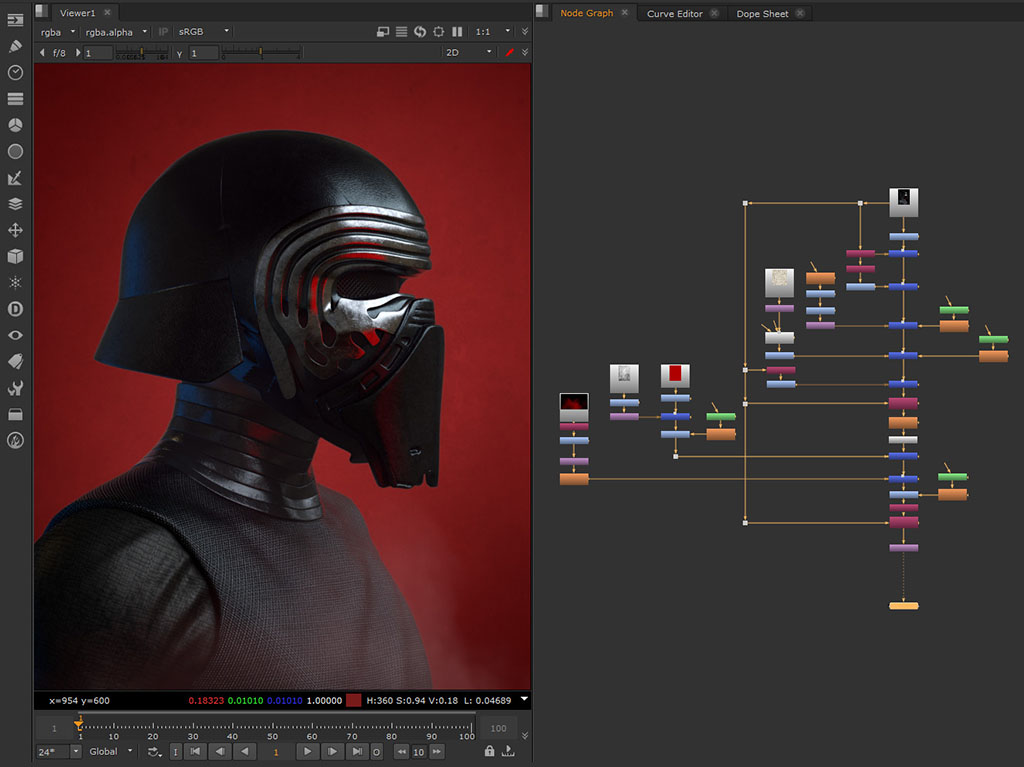
Compositing in Nuke
The final touches were completed in Nuke. Using the render passes, I enhanced the image’s contrast, highlights, and shadows.
For example, the ambient occlusion pass added subtle depth to crevices, while the specular pass boosted reflections. I also used the ZDefocus node with the depth pass to create realistic depth of field.
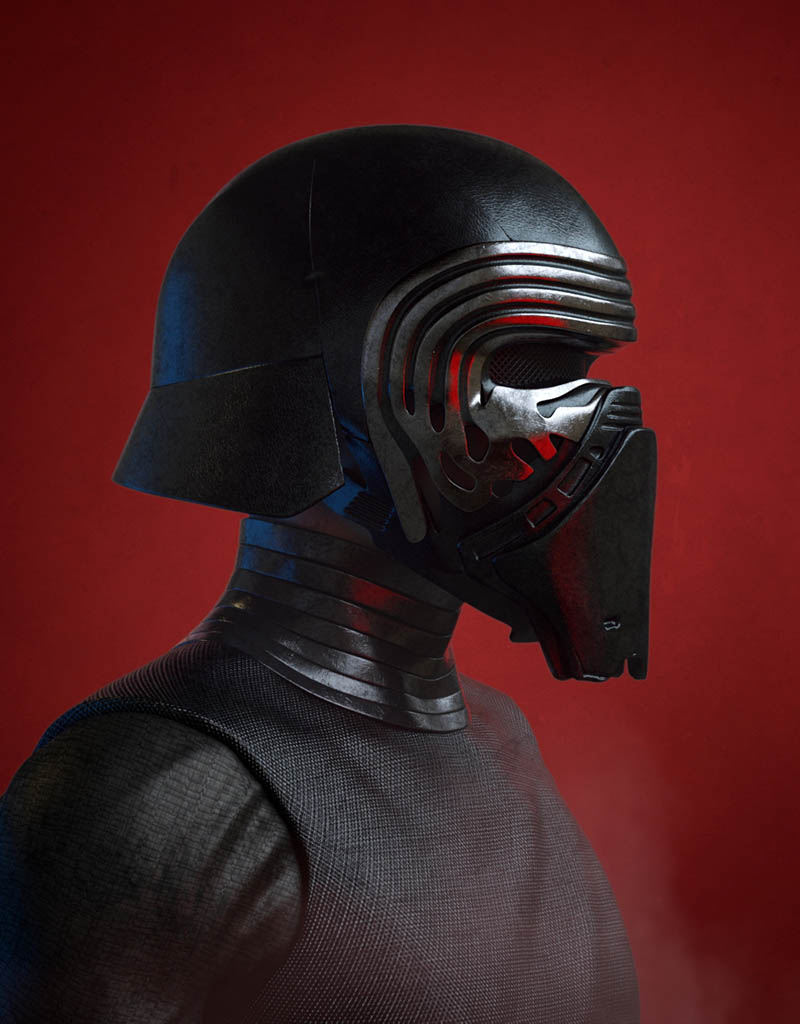
To complete the scene, I added a red background and smoke effects, reinforcing Kylo Ren’s dramatic and mysterious persona.
Final Render
The final image is a culmination of careful modeling, sculpting, texturing, lighting, and compositing. Kylo Ren’s mask and costume come to life in this detailed portrait, paying homage to a striking character design.
Thank you for taking the time to read about my process! If you’re interested in more breakdowns like this, check out my portfolio or follow me on ArtStation.
Walter Leon
Nyx is an editor at Vertex Mode and a passionate 3D artist with years of experience in both gaming and film. With a deep love for digital art and visual storytelling, Nyx brings a unique blend of technical expertise and creative vision to every project. From sculpting detailed characters to designing immersive environments, their work reflects a commitment to pushing the boundaries of what’s possible in 3D design.
At Vertex Mode, Nyx not only oversees content but also shares valuable insights into the world of digital art and the creators behind it. They believe that every artist has a story worth telling, and through thoughtful articles and features, Nyx highlights the talent, challenges, and inspiration that shape the creative industry. Their perspective as a working 3D artist allows them to connect with readers in a way that feels both authentic and relatable.
Nyx’s expertise spans across concept development, modeling, and animation for both gaming and cinematic experiences. By blending artistry with technical precision, they continue to explore how digital tools can unlock new creative possibilities.
Through Vertex Mode, Nyx aims to inspire both aspiring and professional creators, offering resources, insights, and encouragement to thrive in the ever-evolving world of digital art.