Introduction:
In today’s quick tutorial, we’ll explore a great technique to add noise to your images in Photoshop, ensuring flexibility for future edits.
Say goodbye to the hassle of merging layers whenever you want to introduce noise – let’s dive into a more thoughtful approach.
If you prefer to follow a video tutorial, go ahead and take a look at this video.
How do I add noise in Photoshop?
Step 1: Opening Your Image:
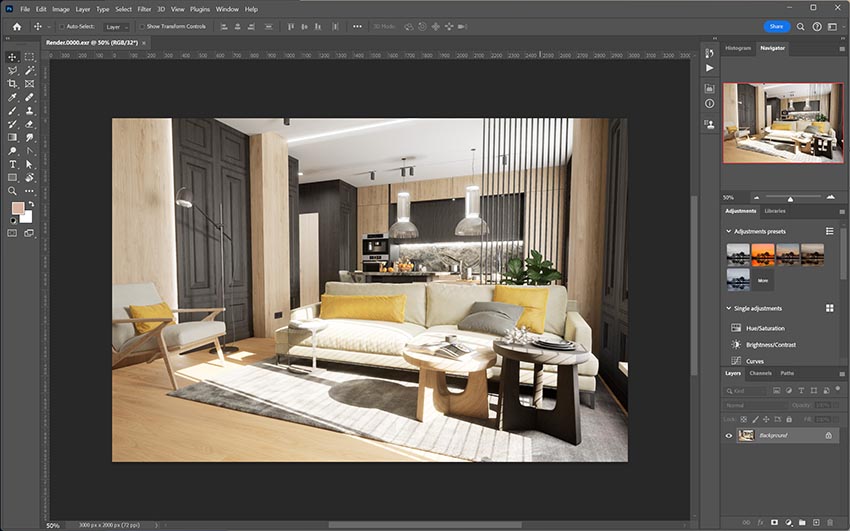
Begin by opening your desired image in Photoshop. For this tutorial, we’ll be using a render from Unreal Engine.
Step 2: Creating a New Layer:
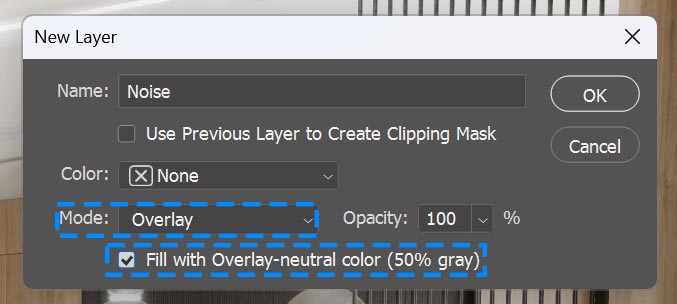
Create a new layer to maintain the ability to edit noise options later. This step ensures that your original image remains untouched.
Set the new layer’s mode to “Overlay” and check the “Fill with Overlay Neutral color” option. These settings will prepare the layer for the upcoming noise addition.
Step 3: Converting to Smart Object:
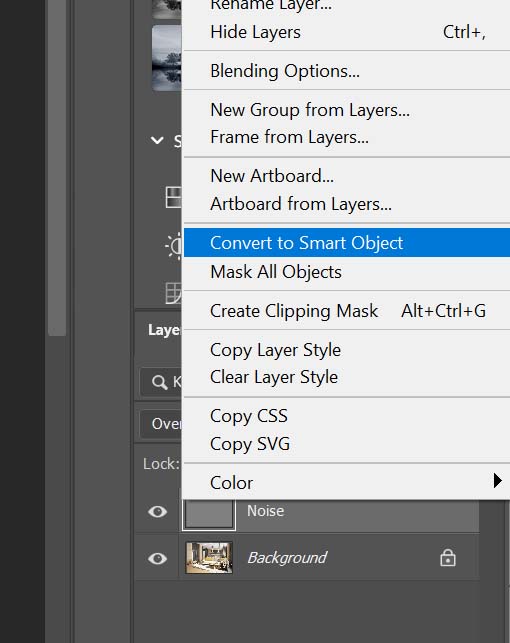
Right-click on the newly created layer and select “Convert to Smart Object.” This step is crucial for preserving the flexibility to edit noise options any time.
Step 4: Applying Noise Filter:
With the layer now a Smart Object, apply the Noise filter to introduce the desired amount of noise to your image.
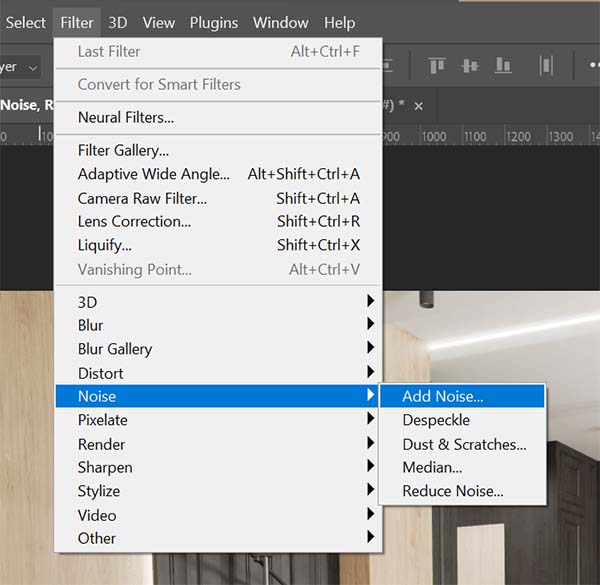
Because the layer is now a Smart Object, the noise appears as a “smart filter.” This means you can easily revisit and adjust the noise options whenever needed.
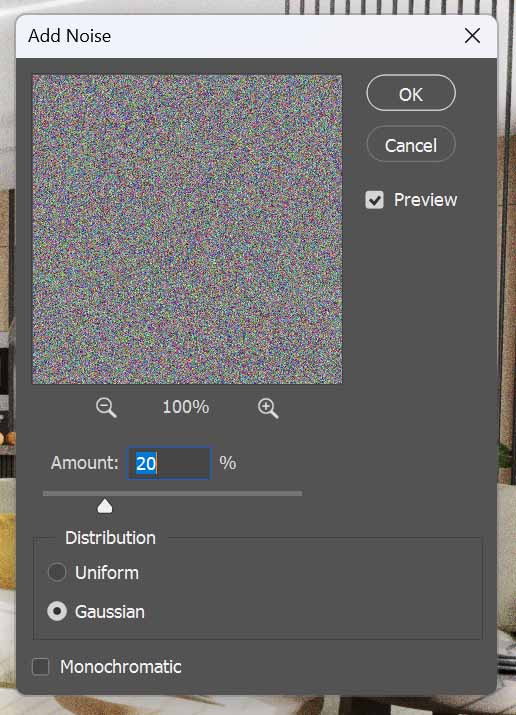
Unlike the traditional method of merging layers, this technique allows you to keep your noise on a single layer while working with multiple layers beneath it. This separation enhances your workflow and simplifies the editing process.

Conclusion:
You’ve successfully learned how to add and edit noise in Photoshop without merging layers. This smart approach ensures you can fine-tune your noise settings whenever necessary, providing ultimate flexibility in your creative process.
Thank you for reading, and happy editing!

Nyx is an editor at Vertex Mode and a passionate 3D artist with years of experience in both gaming and film. With a deep love for digital art and visual storytelling, Nyx brings a unique blend of technical expertise and creative vision to every project. From sculpting detailed characters to designing immersive environments, their work reflects a commitment to pushing the boundaries of what’s possible in 3D design.
At Vertex Mode, Nyx not only oversees content but also shares valuable insights into the world of digital art and the creators behind it. They believe that every artist has a story worth telling, and through thoughtful articles and features, Nyx highlights the talent, challenges, and inspiration that shape the creative industry. Their perspective as a working 3D artist allows them to connect with readers in a way that feels both authentic and relatable.
Nyx’s expertise spans across concept development, modeling, and animation for both gaming and cinematic experiences. By blending artistry with technical precision, they continue to explore how digital tools can unlock new creative possibilities.
Through Vertex Mode, Nyx aims to inspire both aspiring and professional creators, offering resources, insights, and encouragement to thrive in the ever-evolving world of digital art.

